One of the great things about living in a place like San Francisco is all the awesome free stuff you can find on the street. Just this weekend I saw a large leather lounge chair on the corner. A jeep blasting music pulled up with 3 excited people jumping out, exclaiming, "Oh my god, I love this!" I hope this habit of purging, and passing things onto the "universe" doesn't ever stop. I know its easy to post things on Craigslist, but I love the simple, communal custom of putting stuff out on the street. Sure, it can look like a pile of garbage(because sometimes it is garbage) but often, another person's trash really is another person's treasure.
But let's get to the point of this post- a makeover! This side table was found, of course, on the street, by my good friend, Katherine. She picked it up hoping that I could refurbish it for her guest room, in which she will use it as a nightstand.
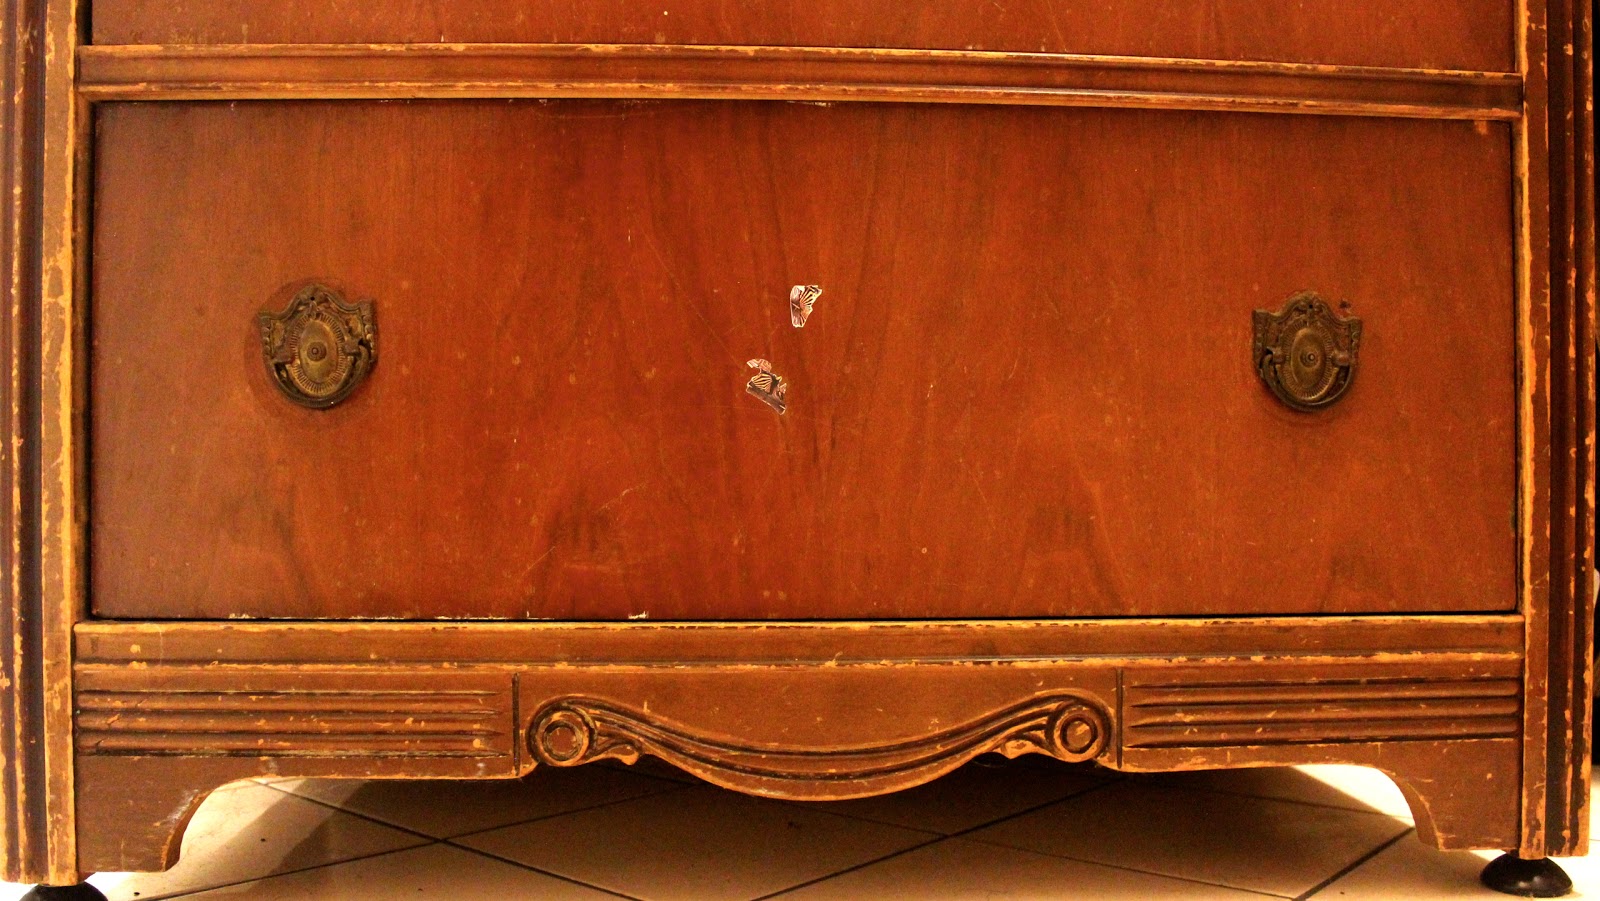
It was an interesting piece, with intricate, Colonial style details. On the inside of the cupboards are these wooden separators, which I couldn't figure out at first. But now I think this could have been sold as a record table and the slots are there to hold the records up. Pretty cool idea! If I'm wrong, please tell me. I'd like to know what purpose they serve.
The paint color was this dreary, dark greige and it was chipping in many places. The doors have a nice raised facade detail, but one piece was missing. At first I didn't even consider replacing that. But then I thought, 'C'mon Alden, you're creative. You can fix that.'
So I went to the hardware store with James and we bought a 1/4" dowel. At first we thought I'd have to cut the dowel in half to fix it to the door, but we weren't confident we could do that with such a skinny piece of wood. Then I thought of sanding the dowel down to half its size. And that worked perfectly!
We cut the edges on a slant and fit it to the cabinet door with wood glue, filling in the small cracks with wood putty. It turned out so well you can't tell which piece we replaced. I'm still patting myself on the back for that DIY.
The original knobs were interesting, but didn't seem to fit the style of the piece. So I ordered a pair from
Anthropologie. I was drawn to the pretty clover detail as well as the colors since I knew the guest room has accents of pinkish rose. I decided to paint the table with Pure White by Valspar in a semi-gloss. I wanted a slight shine as well as the durability that a gloss paint provides. I brought in more gold by painting the feet with Devine Karat by Valspar, which you can pick up at
Target, as well as spray painting the rest of the hardware in Rust-oleum's Gold Metallic. These accents compliment the gold that was already in the Anthropologie knobs.
The interior of the nightstand also needed some love. I cleaned it out; for some reason there was gum in there, yuck. Then I sanded and re-stained the bottom shelf in a dark walnut to match the rest of the interior.
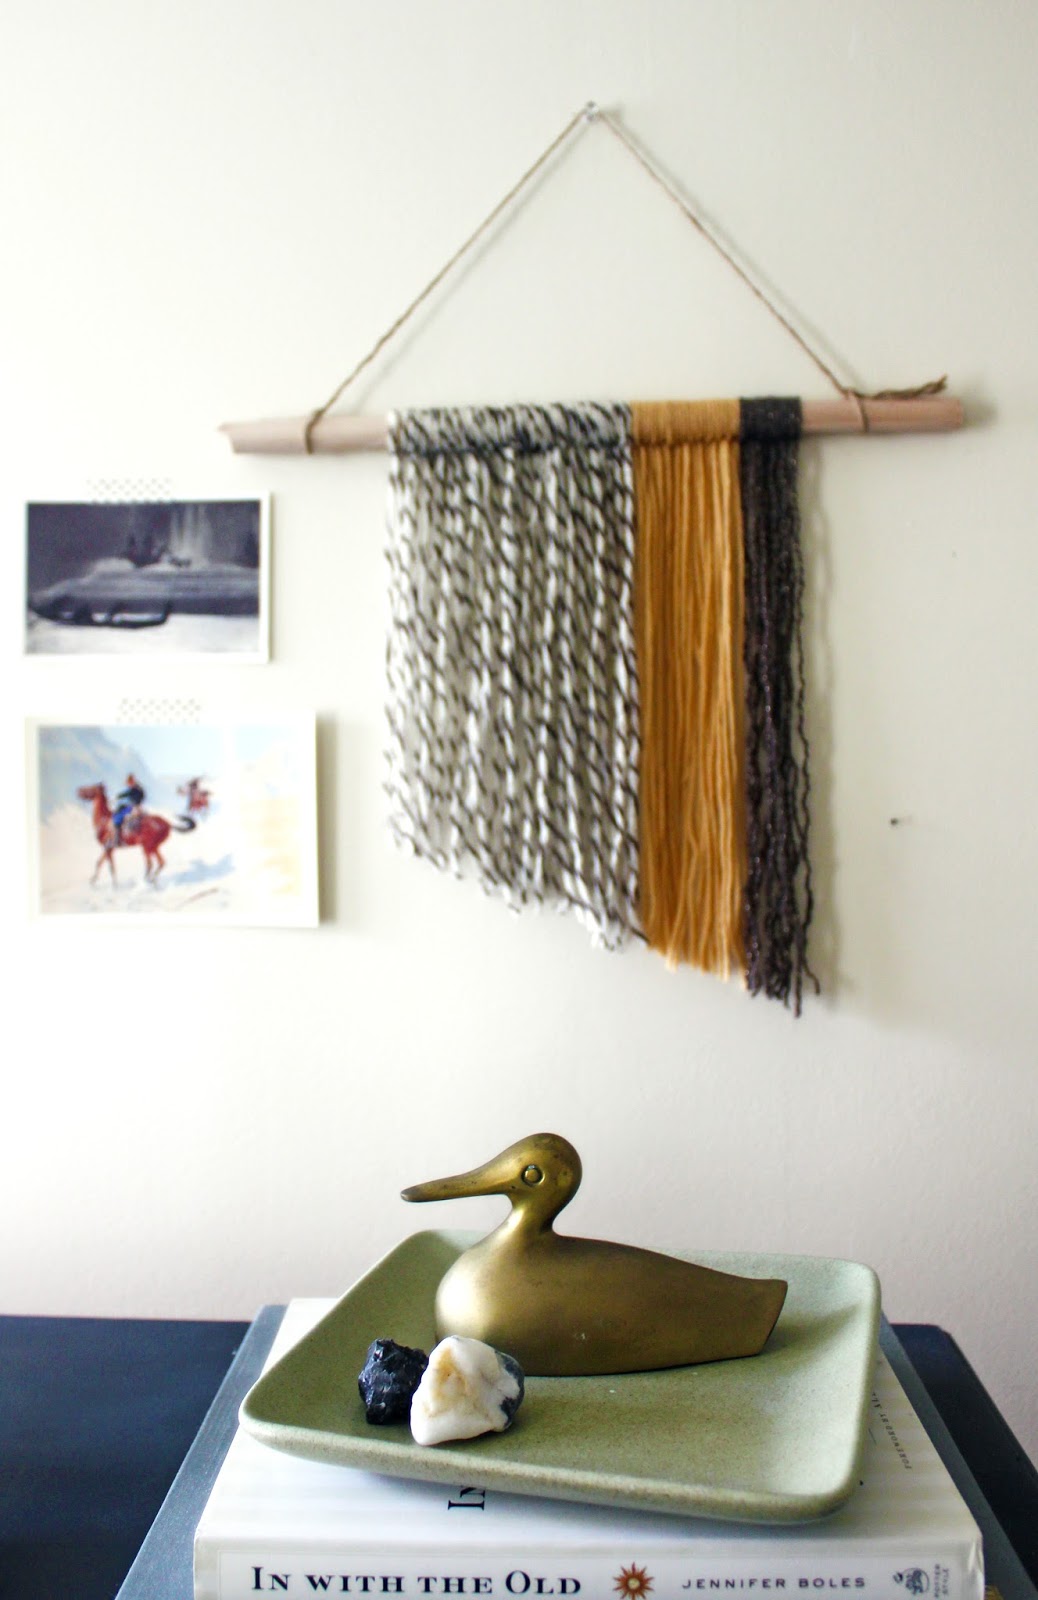
For the blog, I styled the piece as a side table, but as I said before, Katherine will be using it as a nightstand. I think it could easily function as either with a reading lamp, a couple good books and a cup of tea. Now that's a recipe for relaxing.
I hope you liked this makeover, but most importantly, I hope Katherine will like it. And as always, thank you to the San Francisco street donators; you guys are the best!